How to Make Dr. Seuss Marshmallow Hats
Superficial for a playfulness recipe to hold available to make with your children? How about something to play to the future birthday party operating room playdate? Then you've definitely establish it with the Dr. Seuss Marshmallow Hats!
These little fun marshmallow desserts are the cold accompaniment to any social function and they are super cute in addition! Easy made, only three ingredients, and a hale lot of memories to be ready-made when you ask your little ones to join you in the kitchen.
Wherefore Baking hot with Your Children Creates Valuable Memories
The majority of adults have at the least one memory of spending time in the kitchen with combined of their loved ones and standing at the counter (with the help of a chair) piece wearing away an proscenium that is probably a few sizes too big. It's the feeling of finally being allowed to plunge into batters and mixes to create a masterpiece and the feeling of accomplishment there is to be had when their dressed intersection was on the counter for each to see that warms the hearts of your children.
Baking hot with your children creates memories and a bond that will last until adulthood. Spending fourth dimension with your children when they are young not single nurtures them merely yourself, allowing them a safe and sound chance to be creative and research their artistic side.
Not only are you creating valuable memories; you are as wel teaching them responsibility as they navigate the kitchen and all the appliances. You teach them how to see a visualise through to the stop and the best part? They are allowed to follow mussy and get their hands dirty!
How to Turn Baking into a Object lesson About Kitchen Safety for Children
Kitchen safety is a John R. Major concern for most parents and there are always rules in situ when it comes to being in the kitchen, even with adult supervision. Don't reach into this, stand back from that, etc. would definitely be familiar terms not only to children but us as adults likewise.
Practice the time you spend with your children in the kitchen while baking their favorite cookies or dessert to teach them about kitchen safety. What to touch, what not to touch, how to function oven mitts when treatment hot food, etc. While showing them how to prepare a recipe, you are allowing them the responsibility of handling sharp knives operating room opposite objects and you are allowing them the freedom to turn connected the stove/oven.
Guarantee that you practice common sense and good kitchen safety while teaching your children how to bake because wish they say – monkey see, rapscallion do!
Equipment Needed:
- Parchment Theme
- Small Microwave Sound Bowl
- Oven Mitts
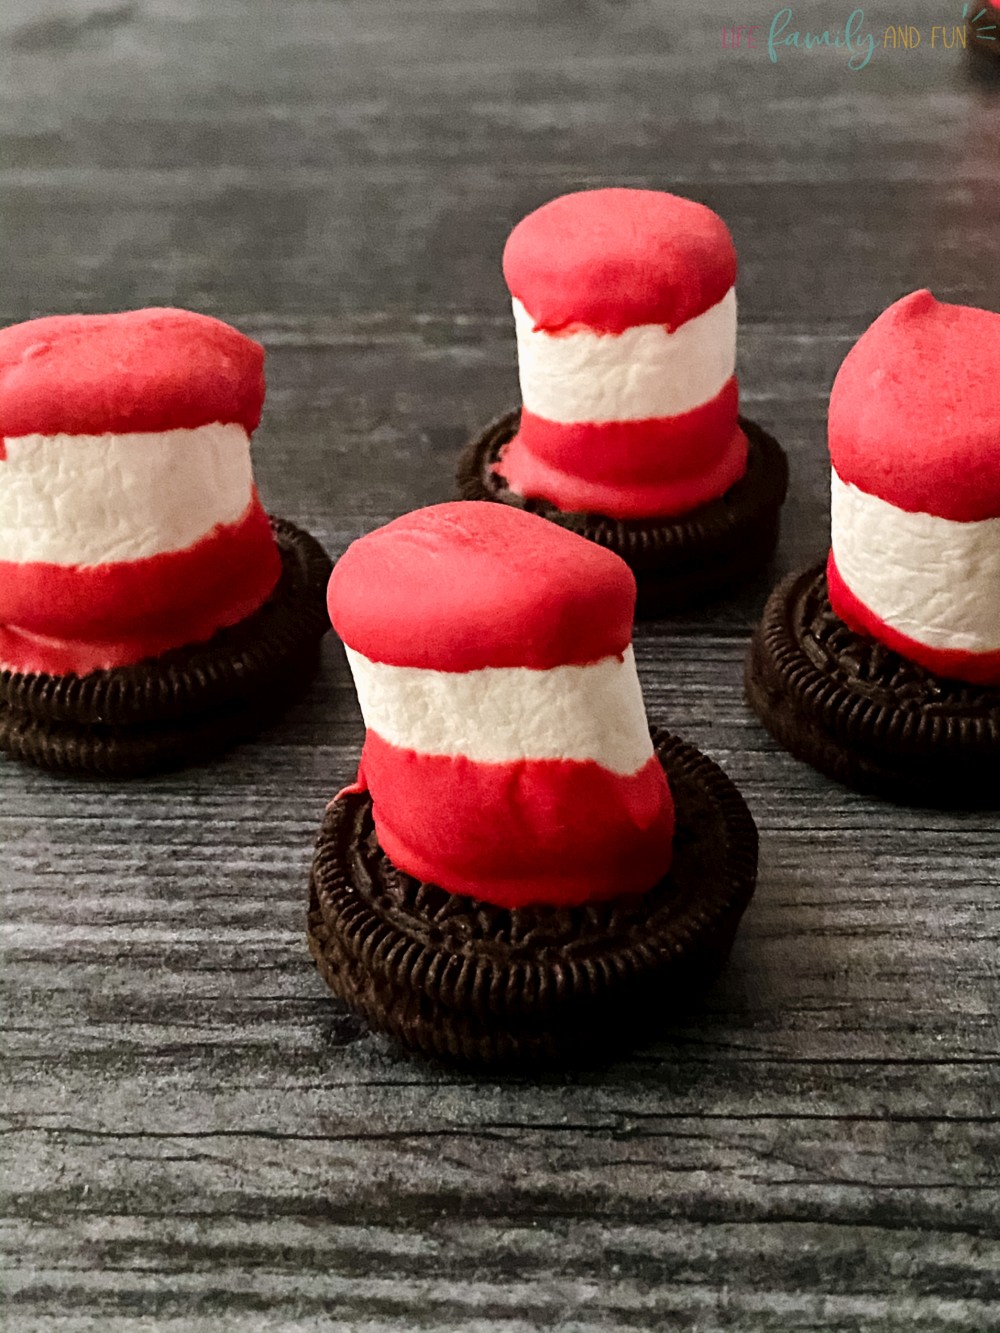
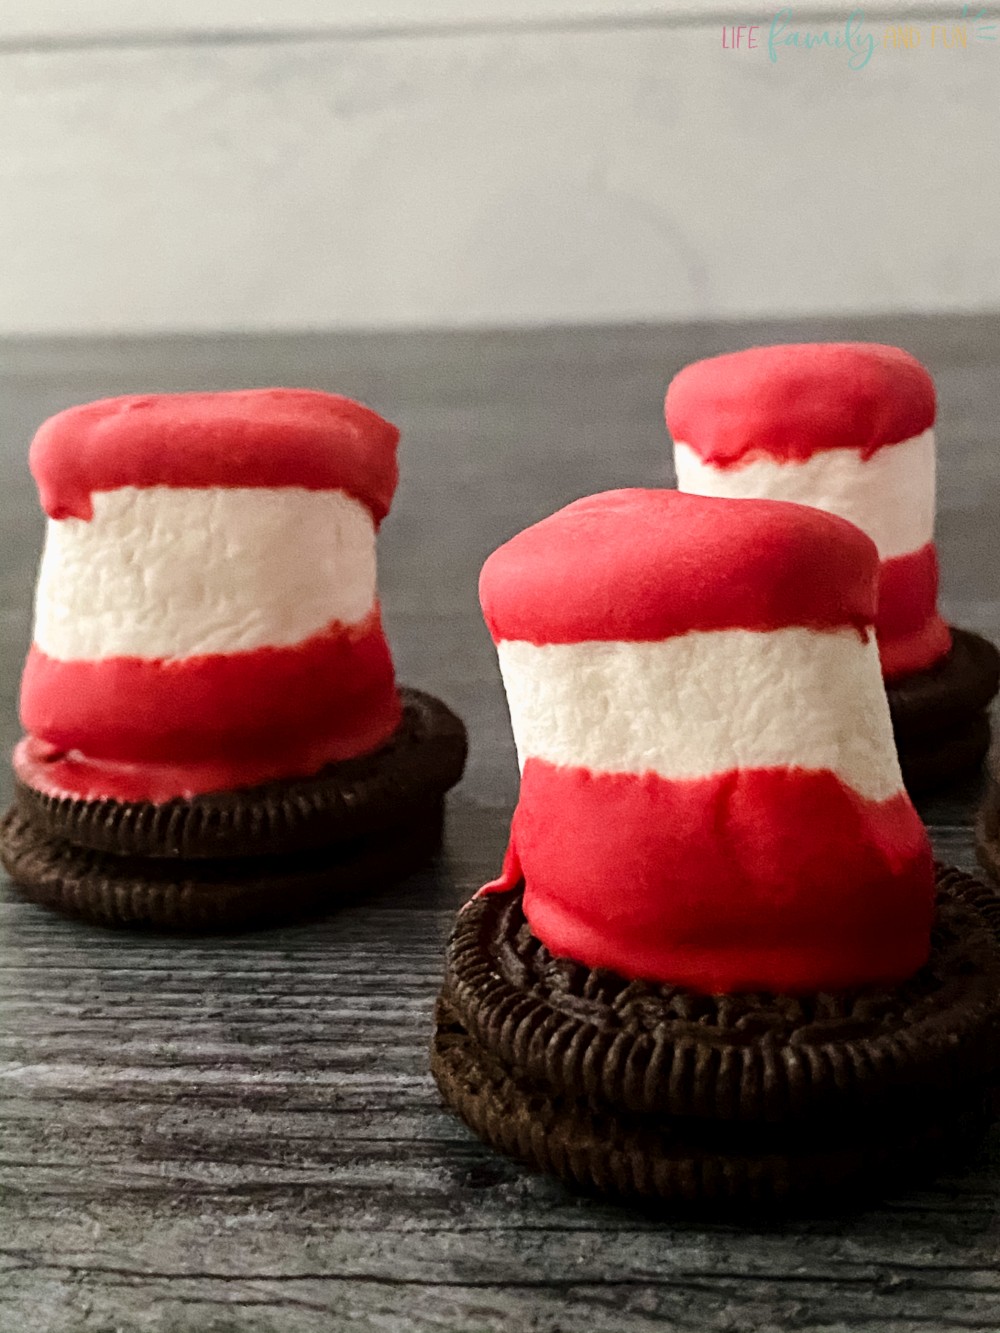
Yield: 6 Jumbo Dr. Seuss Marshmallow Hats or 12 Large Dr. Seuss Marshmallow Hats
Ingredients to make the Dr. Seuss Marshmallow Hats:
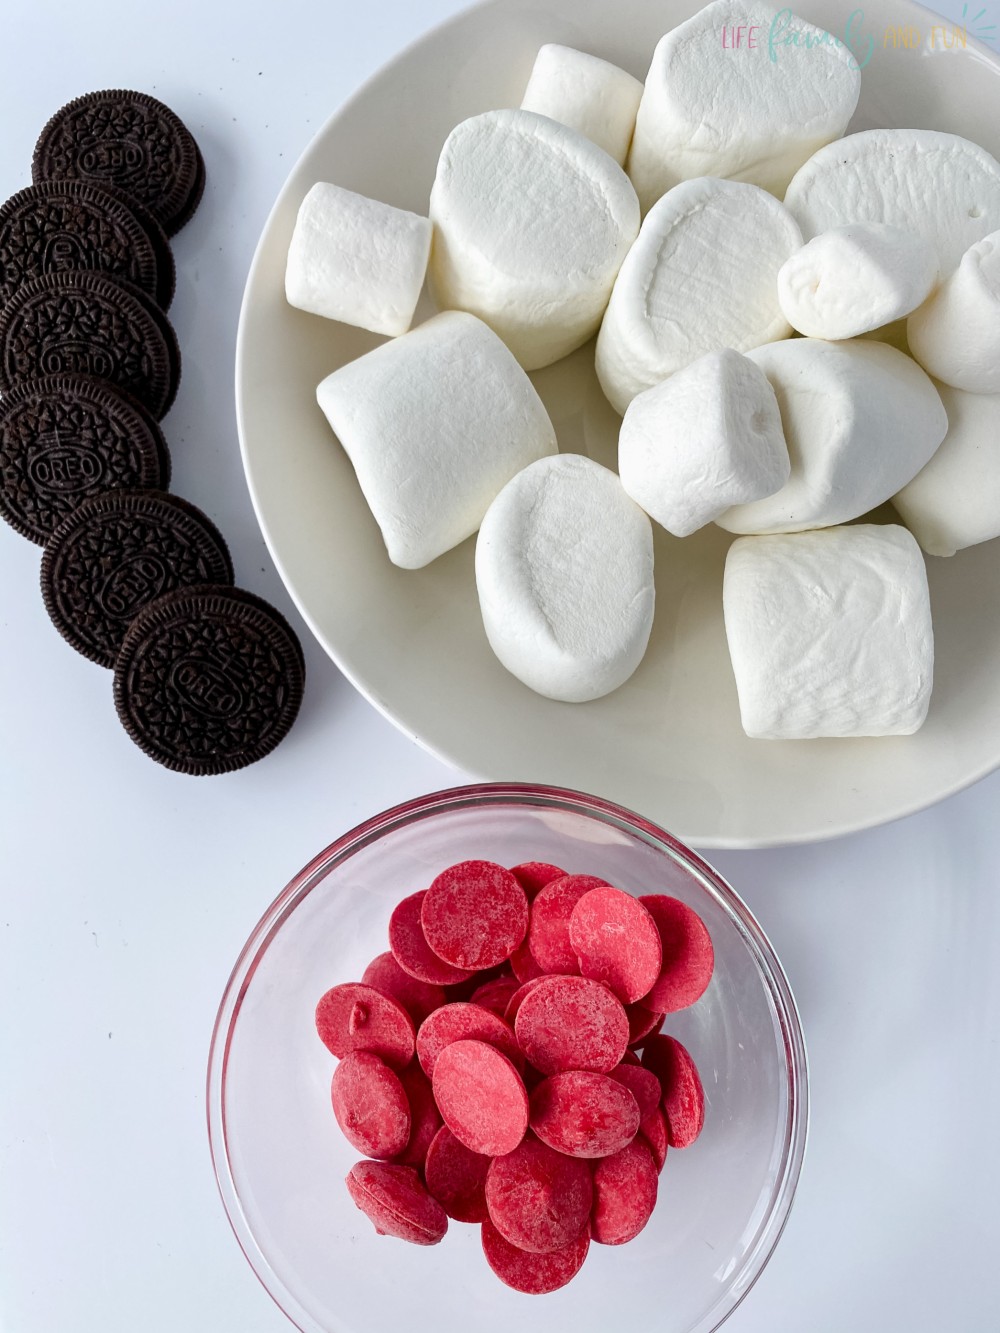
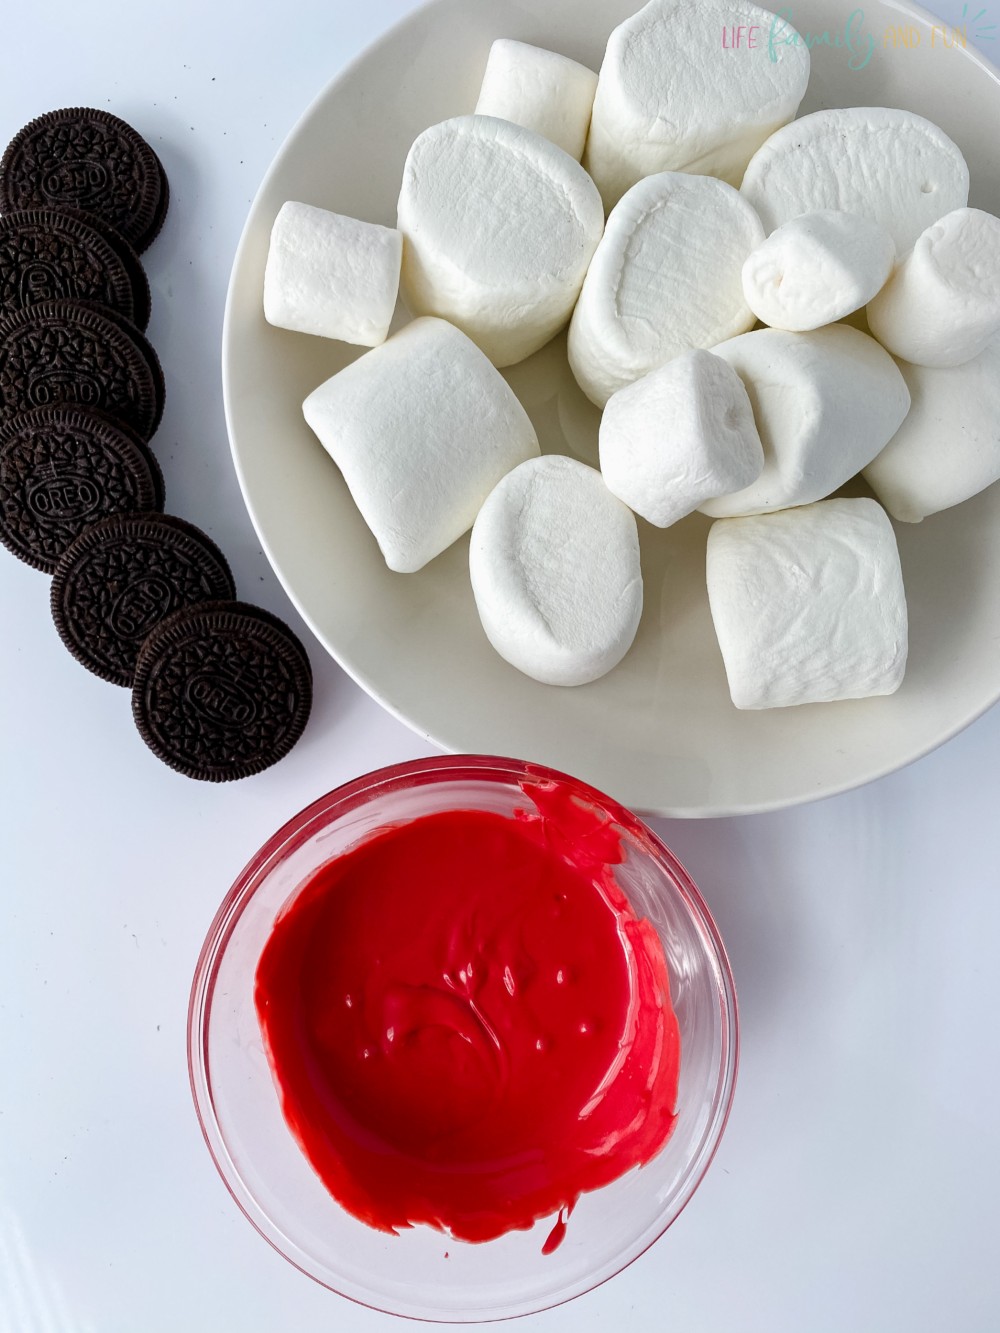
- 1 cup of red candy melts (found in the hot section of your local food market)
- A bag of large or jumbo marshmallows
- Oreos or hot chocolate cookie sandwich baking wafers
How to prepare the Dr. Seuss Marshmallow Hats:
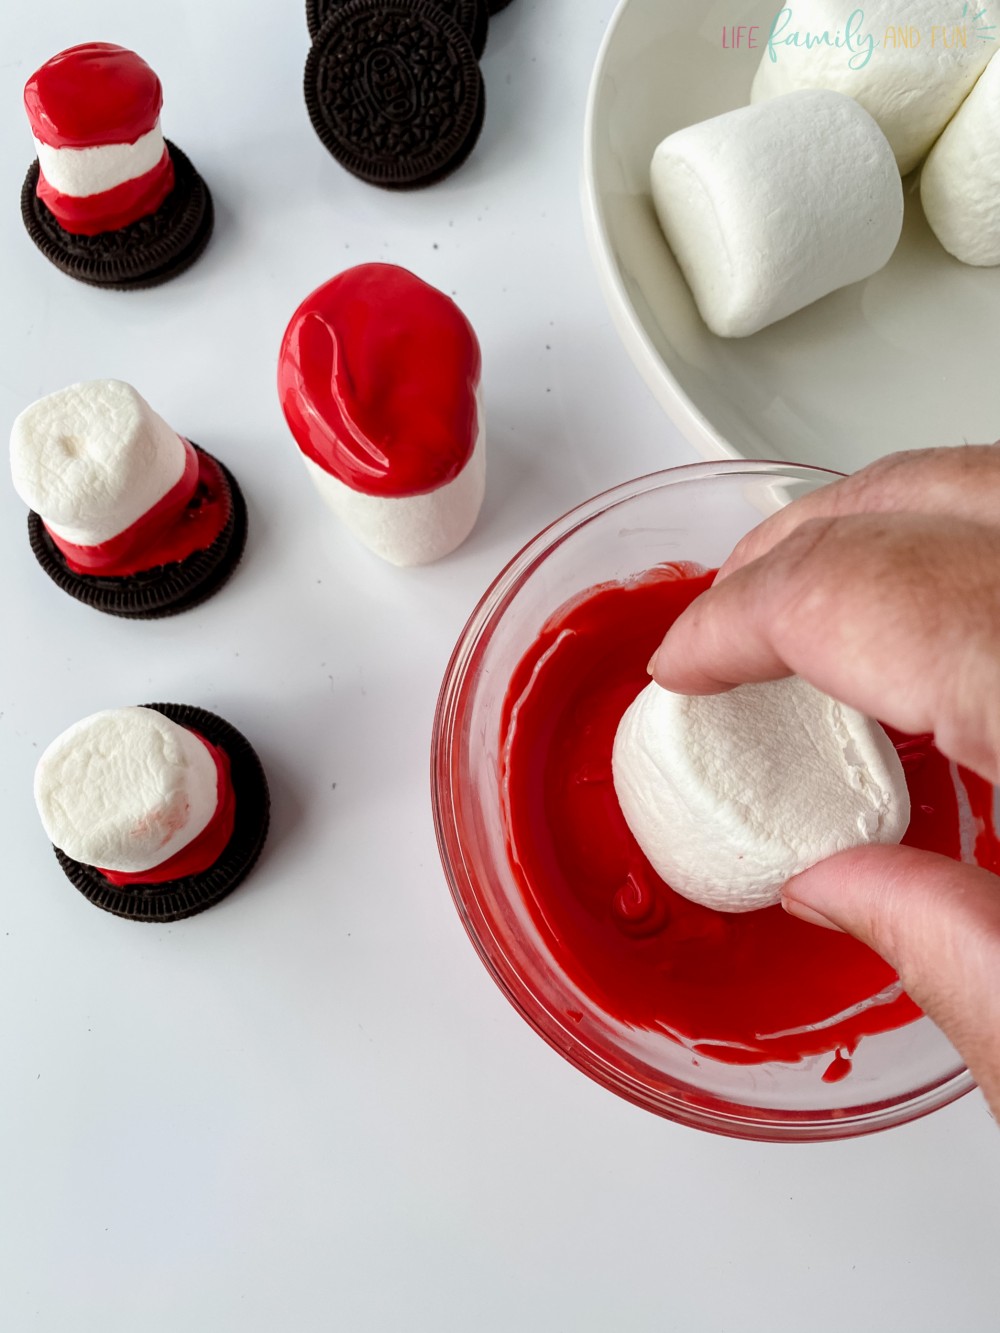
Step 1: Run sugarcoat
Victimisation the small microwave safe bowl, melt the bolshie candy melts as per the package operating instructions. If you bought them unaffixed at a bulk baking ply store – check to see if they have instruction pamphlets or consumption instructions as per a baking meeting place. Typically, you would melt these on medium heat for approximately 10 seconds at a time. Remove from the microwave and stir. Repeat the process until the candy melts are fully molten and inside-out into a liquid without any viewable pieces or chunks.
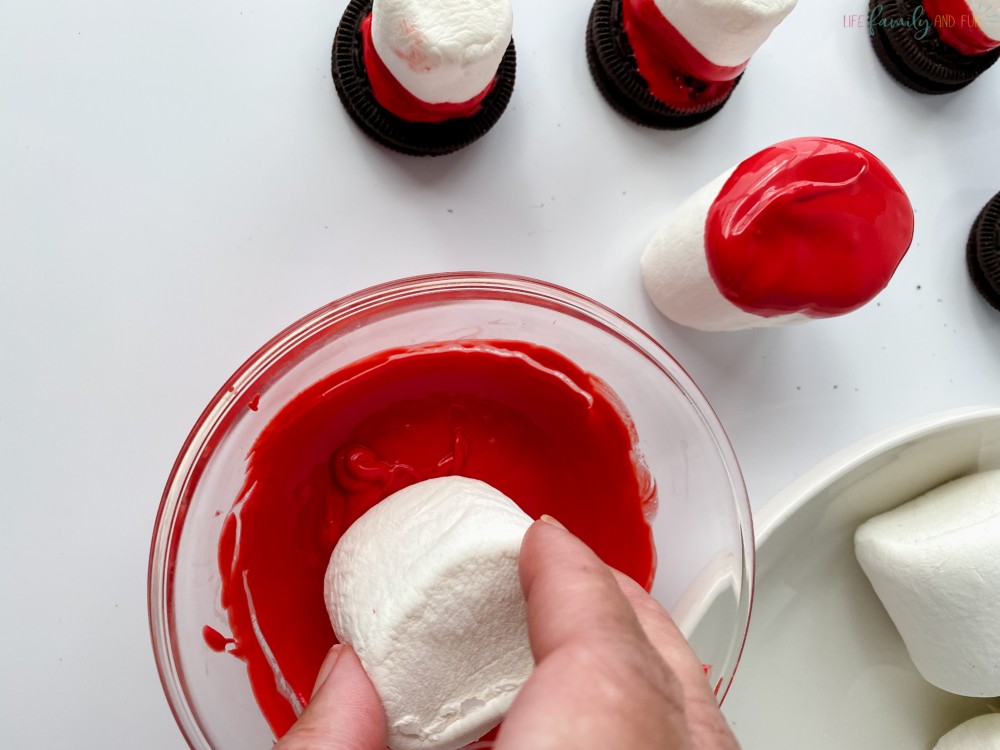
Gradation 2: Dip Mallows
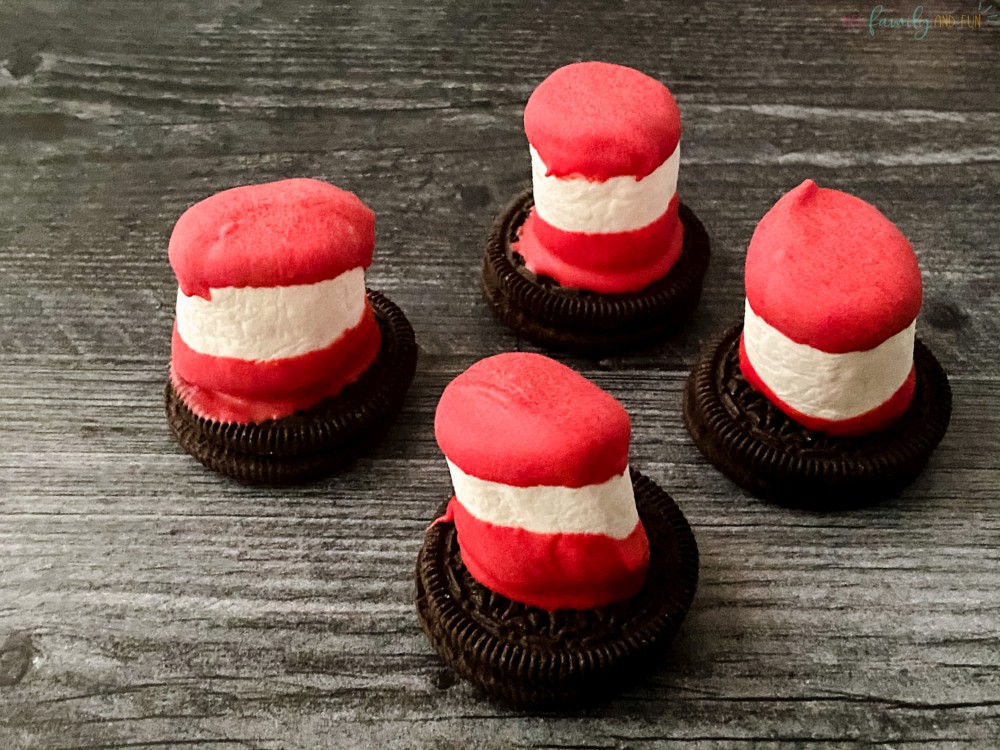
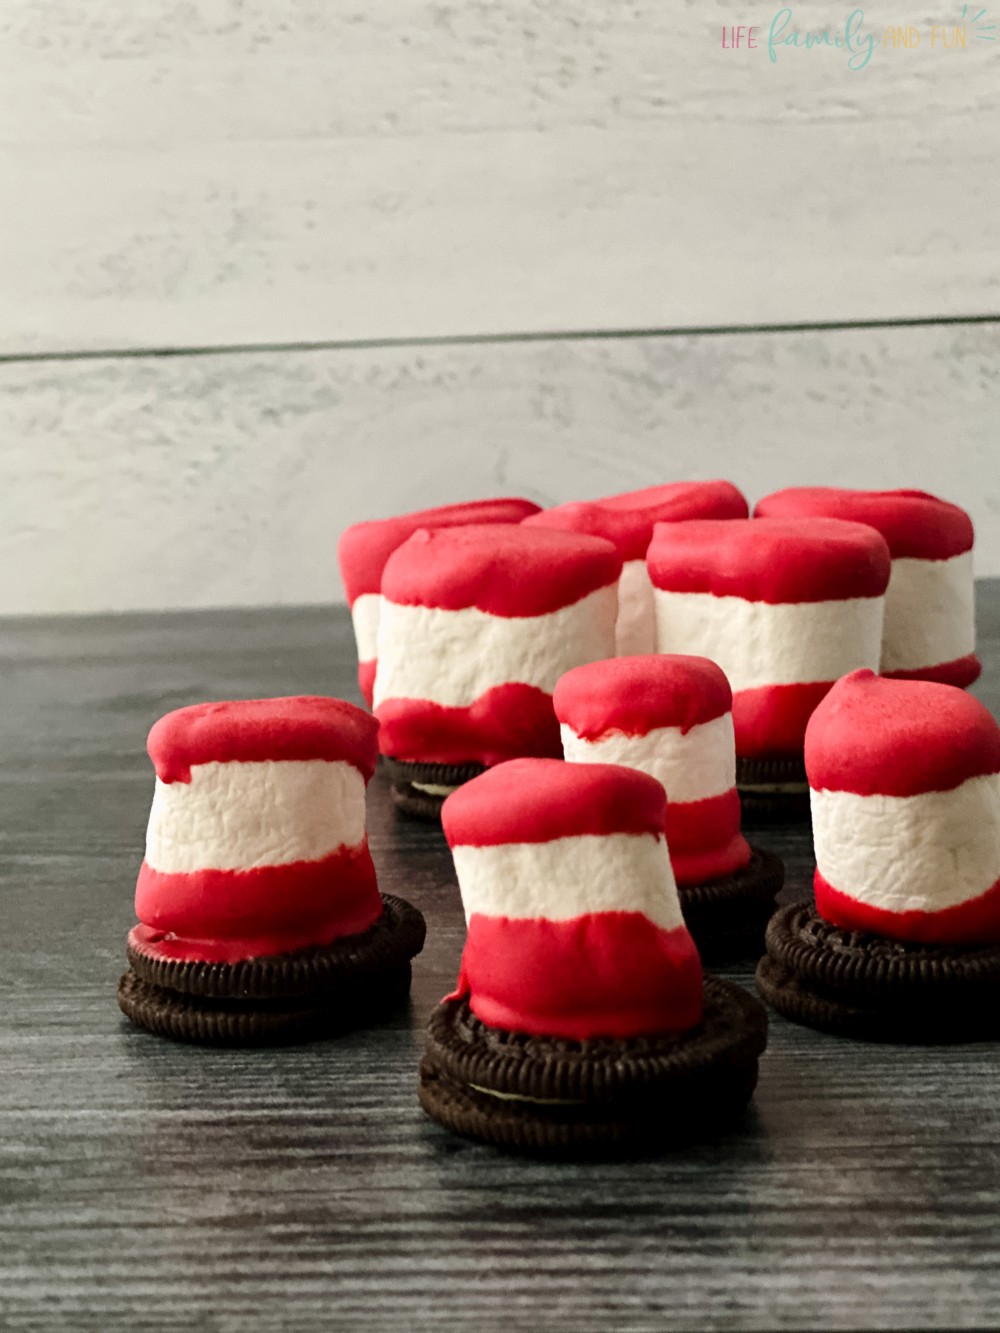
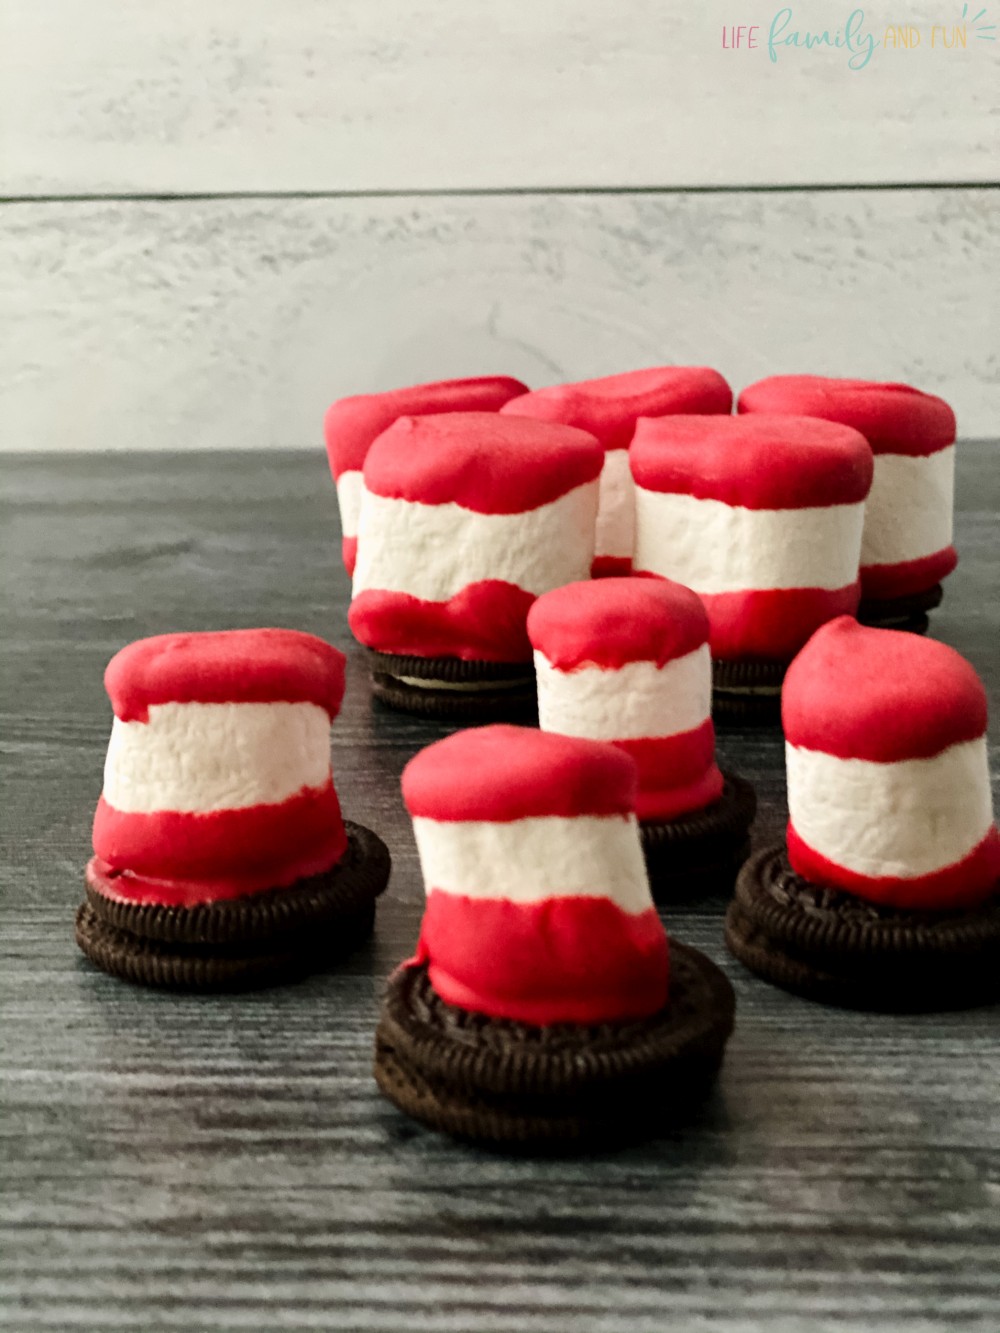
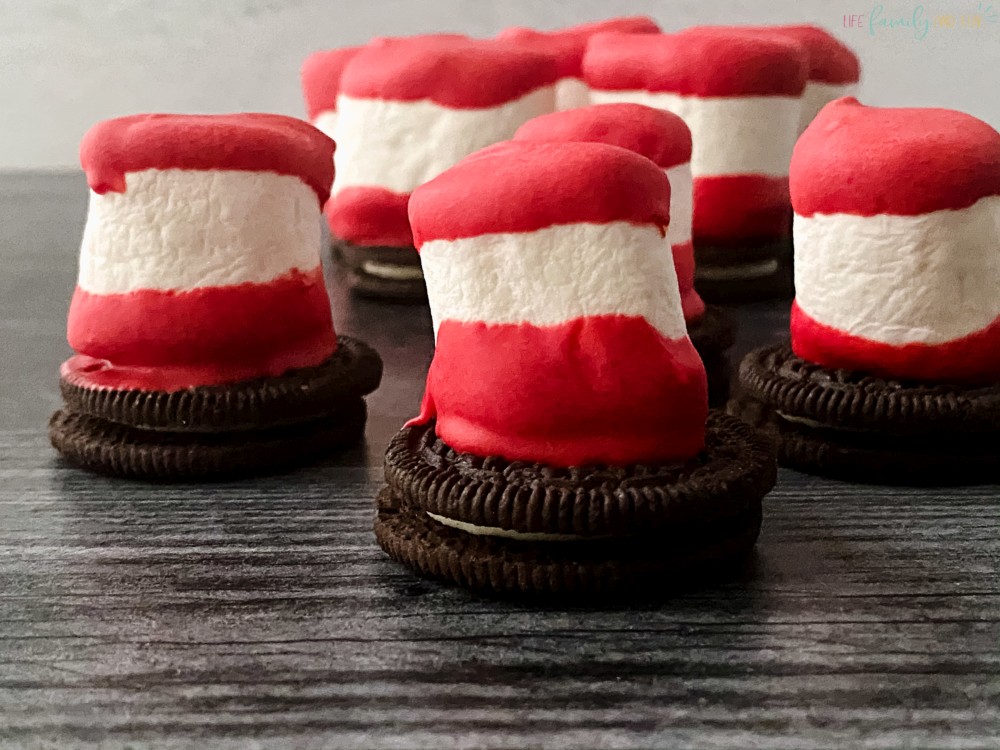
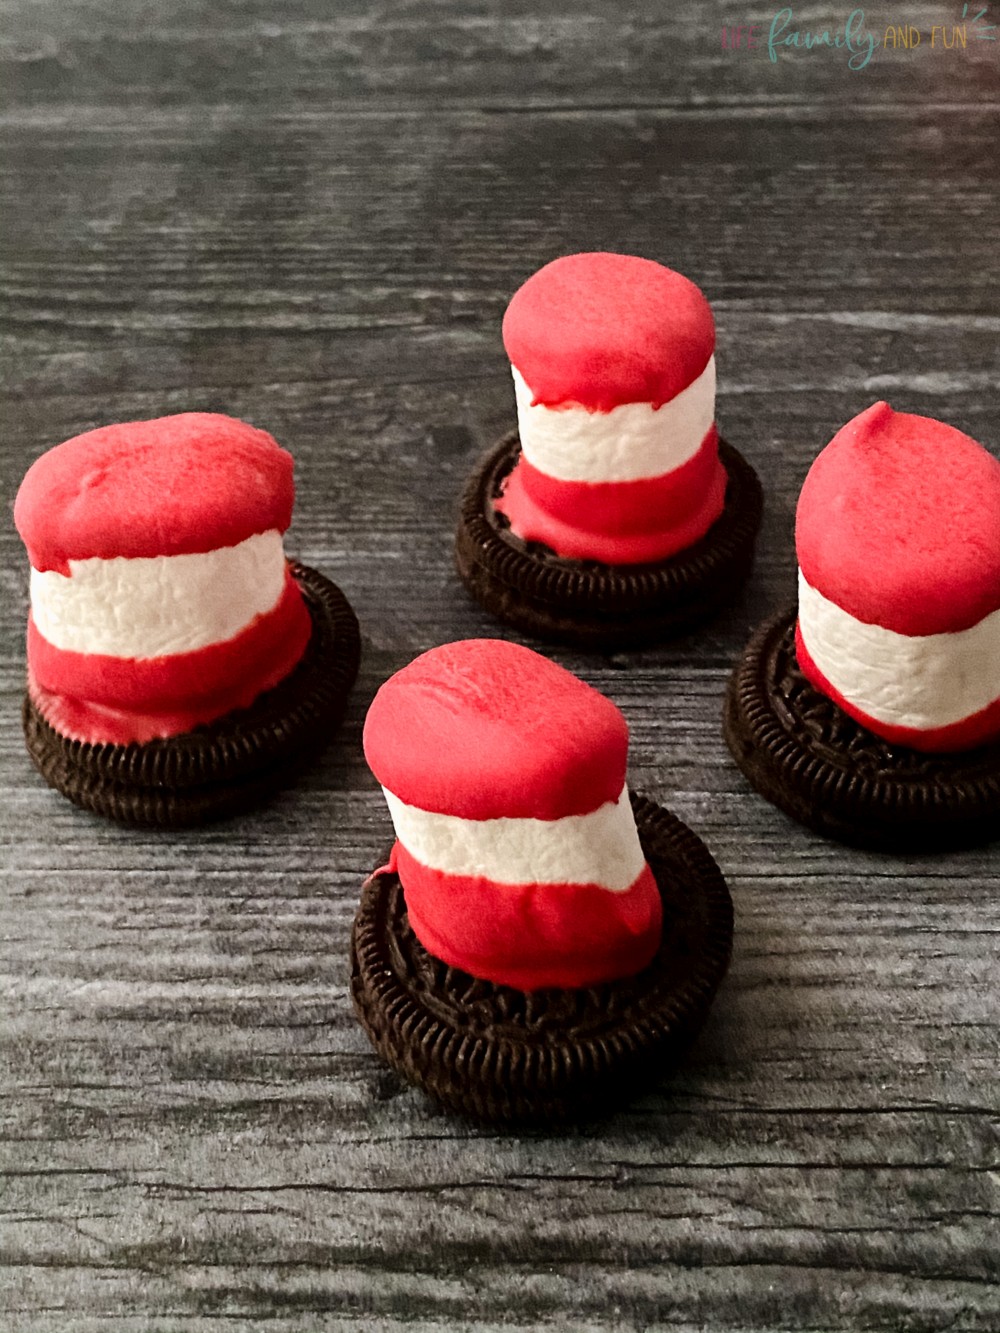
Dip/press indefinite end of the marshmallow into the melted candy melts. Become them upside down and place the not-coated end on the parchment paper. Allow them to air dry for approximately 10 – 15 minutes. The parchment paper helps them to dry without protrusive to the surface of the rejoinder or cookie sheet. This is the first step to create the "chapeau" from the touristy Dr. Seuss books.
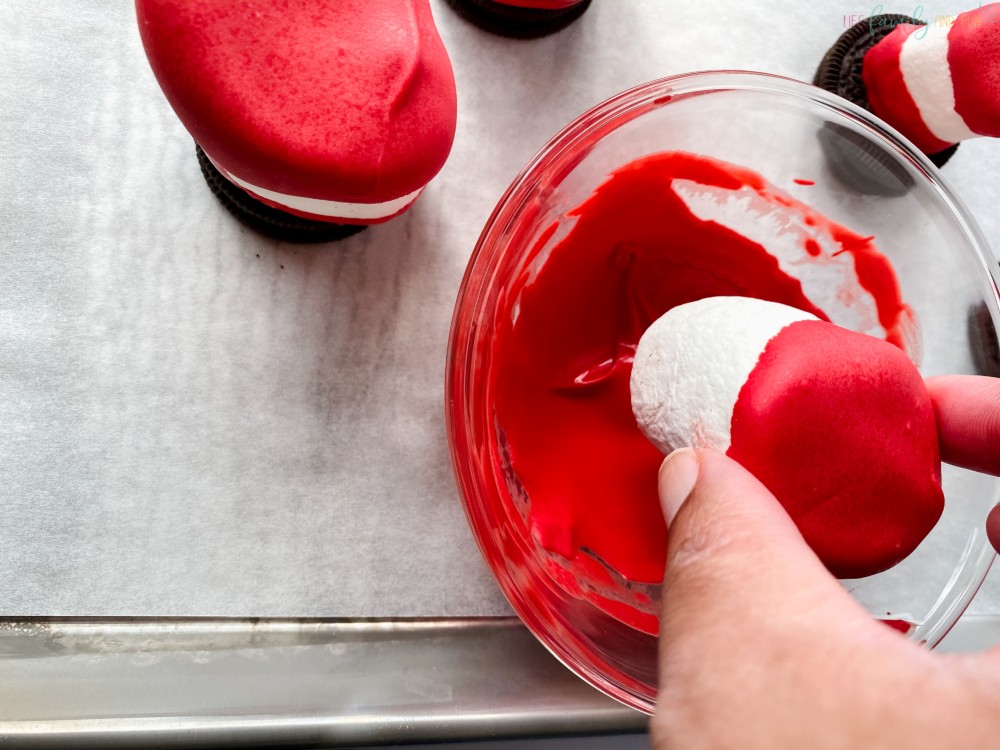
Step 3: Free fall Other Ends
Once the first final stage has been aura dehydrated and is completely set, magnetic inclination the opposite side into the melted red sugarcoat melts. Only allow the melted red candy melts to follow partway up the marshmallow as you want a white disinvest in the middle (the isthmus of the hat).
Step 4: Add to Oreos
Take the clothed end and then press steadfastly into the umber cooky sandwich or Oreo to create a strip and adhere the marshmallow to the cookie sandwich.
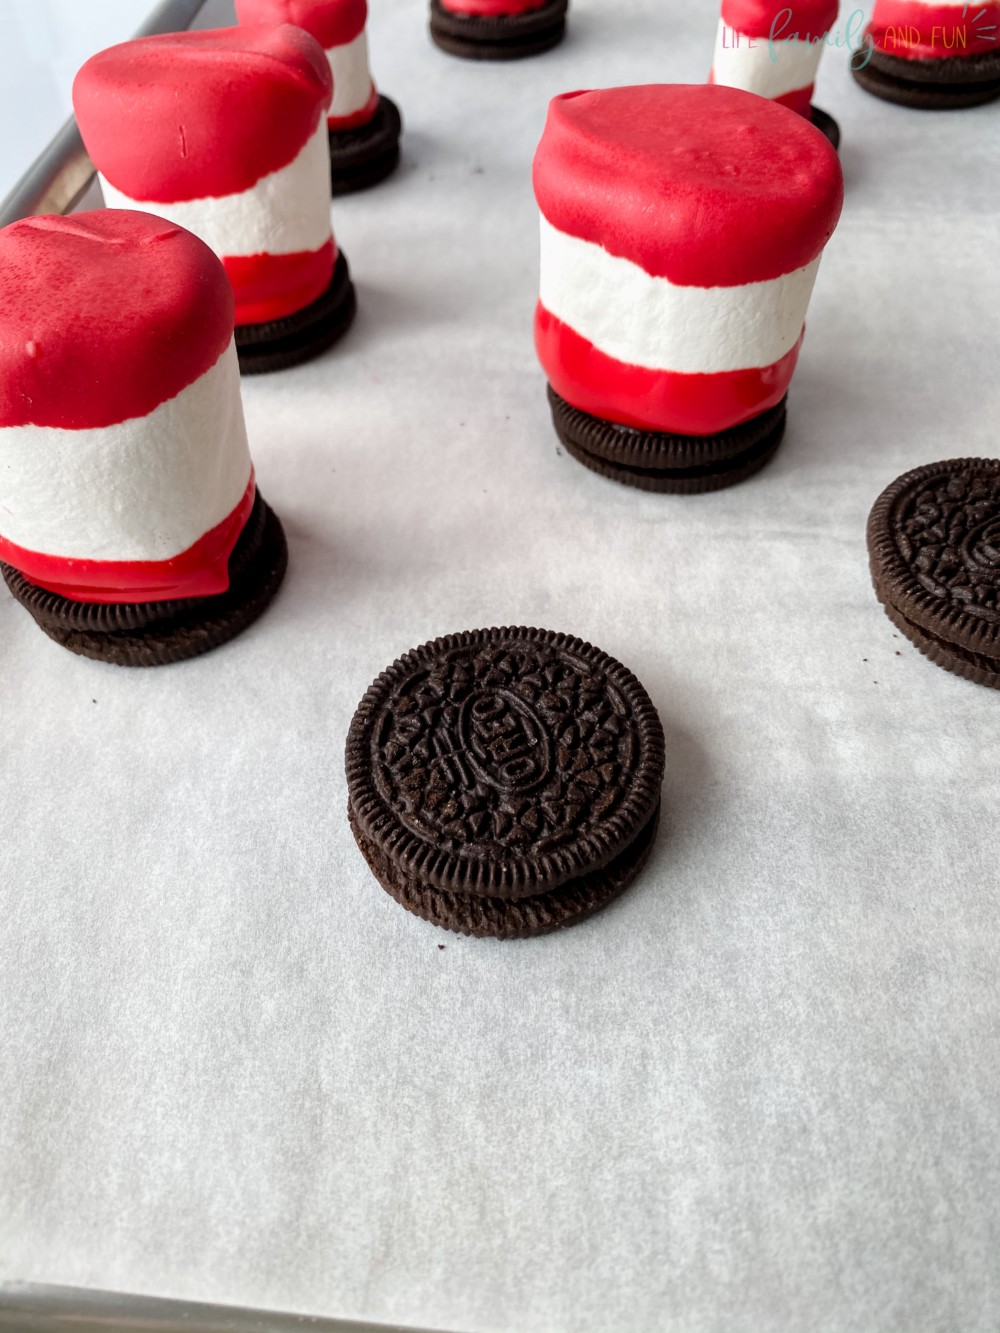
Step 5: Dry
Grant the dipped marshmallows to air dry for another 10 – 15 transactions as you want them to harden into place. You john place them in the icebox if you choose but commemorate! This can cause the marshmallows to lose their softness and go velar besides.
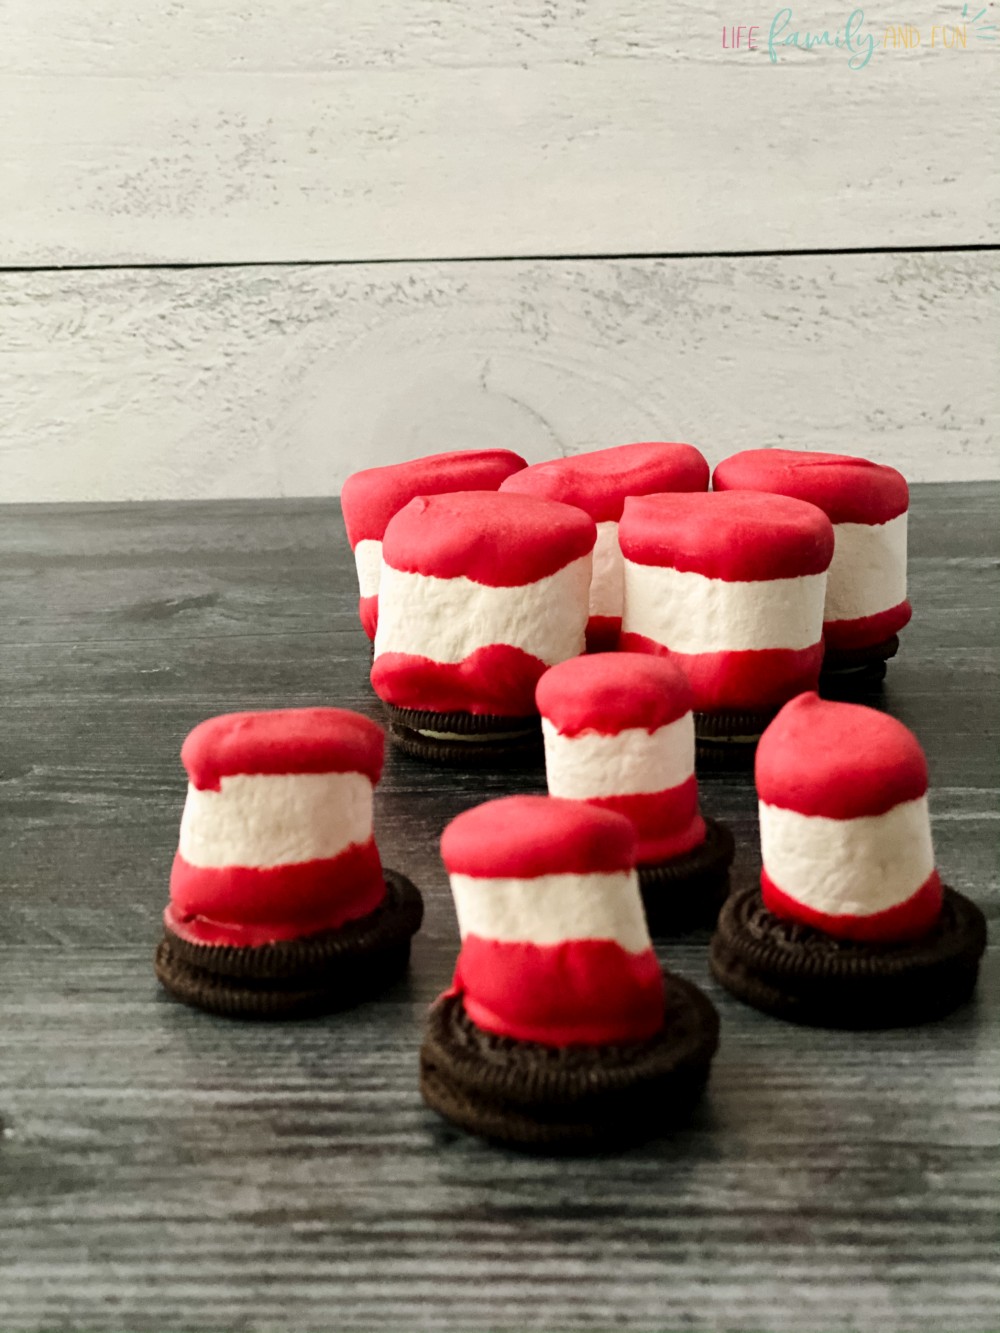
Whole step 6: Serve and Enjoy!
Once all the Theodor Seuss Geisel Marshmallow hats are dried and adhered to their cookie base; arrange them happening a decorative platter. Enjoy!
Notes
- Attempting to dip both sides of the umber simultaneously worked in hypothesis but information technology was far messier than allowing the candy coating to shrivelled on nonpareil end first. You also run the risk of damaging or breaking the cooky sandwich base.
- Attempting to dip and allowing it to desiccated on the chocolate cookie then flipping IT over to coat the top of the "hat" was also non a great success and can be awkward to maneuver.
- Spell jumbo marshmallows will fit on the top of the drinking chocolate cookie sandwich base, they be given the risk of being misshapen and "squat" together. The enlarged marshmallows bequeath resemble more of a hat.


0 Response to "How to Make Dr. Seuss Marshmallow Hats"
Postar um comentário